(519) 622-6550

Cooking and Food Skills

February 10-14 Easy Ideas: Snacks, Meals & reducing waste
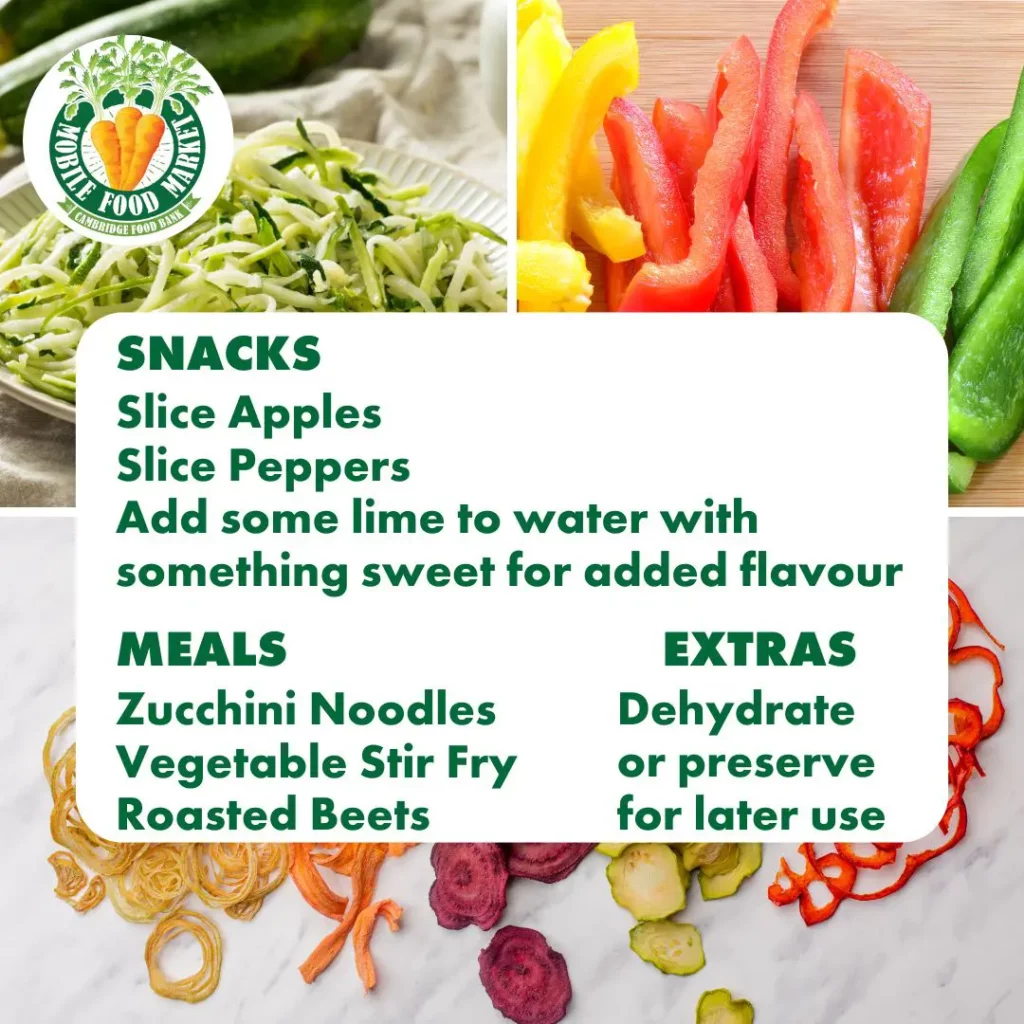
Snacks: Apples

Snacks: Peppers

Apples are a sweet, crunchy, and easy-to-prepare fruit. Here’s how to cut them:

  1. Wash the apple under running water and dry it.
  2. Place the apple on a cutting board with the stem facing up.
  3. Cut the apple in half from top to bottom.
  4. Slice each half in half again to make quarters.
  5. Remove the core by cutting out the seeds and tough center from each quarter.
  6. Slice or chop as needed:
    • Thin or thick slices for snacking, dipping, or sandwiches.
    • Small cubes for adding to salads, yogurt, or oatmeal.

For best freshness, store cut apples in an airtight container and use lemon juice or salt water to prevent browning.

  • Salt Water: Soak apple slices in a mixture of teaspoon of salt per cup of water for 8–10 minutes, then rinse and dry.
  • Lemon Juice: Squeeze a little lemon juice over the slices to slow down browning.

Peppers are a crunchy, colorful, and nutritious addition to snacks and meals. Here’s an easy way to cut them:

  1. Wash the pepper under running water and dry it with a towel.
  2. Remove the stem by slicing off the top.
  3. Cut the pepper in half from top to bottom.
  4. Scoop out the seeds and white parts using a knife or your hands.
  5. Slice into strips for dipping or stir-fries, or chop into small pieces for salads, omelets, or pasta dishes.

Store cut peppers in an airtight container in the fridge to keep them fresh!

Meals: Zucchini Noodles

Meals: Vegetable Stir Fry

Zucchini noodles, or “zoodles,” are a great low-carb alternative to pasta. Here’s how to cut and prepare them:

1. Wash and Prep

  • Rinse the zucchini under running water and dry it with a towel.
  • Trim off both ends with a sharp knife.

2. Choose Your Cutting Method

  • Spiralizer (Easiest & Best for Long Noodles): Insert the zucchini into the spiralizer and turn it to create long, curly noodles.
  • Julienne Peeler: Drag the peeler down the length of the zucchini to make thin, noodle-like strips.
  • Knife Method: Cut the zucchini in half lengthwise, then slice each half into thin strips.

3. Cooking Options

  • Raw: Use fresh zoodles in salads or cold pasta dishes.
  • Sautéed: Cook in a pan with a little olive oil for 2–3 minutes until just tender.
  • Boiled: Drop into boiling water for 1 minute, then drain immediately.

Avoid overcooking to keep the noodles from becoming mushy. Enjoy with your favorite sauce or toppings!

A stir-fry is a quick and flavorful way to enjoy a mix of fresh vegetables. Try this combination using zucchini, beets, onions, bell peppers, and lime!

Ingredients:

  • 1 zucchini, sliced thick pieces
  • 1 apple, thinly sliced
  • 1 beet, peeled and cut into thin pieces
  • 1 small onion, sliced into strips
  • 1 bell pepper, sliced into strips
  • Juice of 1 lime (squeeze juice from lime)
  • 1–2 tbsp oil (olive, sesame, or vegetable or you can substitute with any oil or butter)
  • 1 tbsp soy sauce or any thin sauce
  • ½ tsp garlic (optional)
  • ½ tsp ginger or any season or spice you have (optional)
  • ½ tsp honey, maple syrup, molasses or a pinch of sugar  (optional, for sweetness)

Instructions:

  1. Heat the oil or butter in a large pan or wok over medium-high heat.
  2. Add the onions and beets first, since they take longer to cook. Stir-fry for 3–4 minutes.
  3. Add the zucchini and bell peppers, cooking for another 3 minutes until slightly tender.
  4. Toss in the apple slices and cook for 1–2 minutes. They should stay slightly crisp.
  5. Season with garlic, ginger, soy sauce, and lime juice, stirring well to coat everything.
  6. Taste and adjust flavours, adding a bit of honey, maple syrup or sugar if you like a hint of sweetness.
  7. Serve hot, on its own or over rice, quinoa, or noodles or eat it as is.

This stir-fry is a great balance of sweet, savory, and tangy flavours—perfect for a quick and healthy meal!

Meals: Roasted Beets Recipe

Extras - Reducing Waste

Roasted beets are naturally sweet, tender, and a great addition to any meal. Here’s an easy way to prepare them, along with some substitute options!

Ingredients:

  • 3–4 medium beets
  • 1–2 tbsp oil (olive oil, or substitute with melted butter, coconut oil, or vegetable broth for an oil-free option)
  • ½ tsp salt
  • ¼ tsp black pepper (optional)
  • 1 tsp balsamic vinegar or lemon juice (or substitute with apple cider vinegar, lime juice, orange juice, or a little maple syrup for sweetness)

Instructions:

  1. Preheat oven to 400°F (200°C).
  2. Wash and peel the beets (or leave the skin on and peel after roasting).
  3. Cut the beets into wedges or cubes for faster roasting.
  4. Toss with oil (or substitute) and seasonings in a bowl until evenly coated.
  5. Spread on a baking sheet in a single layer.
  6. Roast for 30–40 minutes, stirring halfway through, until tender and slightly caramelized.
  7. Drizzle with balsamic vinegar, lemon juice, or a substitute before serving for added flavor.

Serving Ideas:

  • Enjoy as a side dish, in salads, or on grain bowls.
  • Toss with nuts, goat cheese, or fresh herbs for extra flavor.

This flexible recipe makes it easy to enjoy roasted beets with whatever ingredients you have on hand!

Purchasing a Mobile Food Market basket can be an adventure—especially when you’re unsure how to use all the items! In addition to our snack and meal ideas, consider ways to save extra food for later. With food costs rising, preserving what you have helps reduce waste and makes meal prep easier when ingredients are ready to use.

If you have extra apples, zucchini, beets, onions, bell peppers, or limes, try these storage methods:

  • Freezing: Chop and freeze in airtight containers. Blanching (quick boiling) helps retain texture for veggies like zucchini and beets.
  • Canning: Pickle beets, onions, or zucchini in vinegar, or make applesauce. Process in a hot water bath for safe storage.
  • Dehydrating: Slice and dry in a dehydrator or low-temperature oven for long-term storage—great for making chips or powders!

Click here for detailed step-by-step instruction.

Click here and follow Health Canada’s food safety guidelines.

How to Freeze, Preserve or Dehydrate Items from one of our Mobile Food Market Basket

When you have extra produce, preserving it ensures you can enjoy it later. Below are different methods for freezing, preserving in jars, and dehydrating apples, zucchini, beets, onions, bell peppers, and lime.


1. Freezing

Freezing is an easy way to keep produce fresh for months. Most vegetables need to be blanched before freezing to maintain texture and color.

Apples:

  • Slice apples and remove seeds.
  • To prevent browning, toss in lemon or lime juice.
  • Lay slices on a baking sheet in a single layer and freeze for 1–2 hours.
  • Transfer to freezer bags or containers, removing as much air as possible.
  • Use for: Smoothies, baking, or blend into applesauce.

Zucchini (for cooking or zoodles):

  • Wash and cut into slices, cubes, or zoodles.
  • Blanch in boiling water for 1–2 minutes, then immediately cool in ice water.
  • Drain well and freeze on a baking sheet before transferring to bags.
  • Use for: Soups, stir-fries, or blending into sauces.

Beets:

  • Wash, peel, and cut into slices or cubes.
  • Blanch for 2–3 minutes, then cool in ice water.
  • Spread on a baking sheet to freeze before transferring to bags.
  • Use for: Roasting, salads, or smoothies.

Onions:

  • Peel and chop (diced or sliced).
  • Spread in a single layer on a baking sheet and freeze for 1 hour.
  • Transfer to freezer bags.
  • No blanching needed!
  • Use for: Cooking (soups, stir-fries, omelettes).

Bell Peppers:

  • Wash, remove seeds, and slice or dice.
  • Spread on a baking sheet and freeze for 1 hour.
  • Transfer to freezer bags.
  • No blanching needed!
  • Use for: Stir-fries, omelets, soups.

Lime (Juice & Zest):

  • Juice: Squeeze and pour into ice cube trays, then transfer cubes to a bag.
  • Zest: Grate the peel and store in a small container or freezer bag.
  • Use for: Dressings, marinades, and baking.

2. Preserving in Jars – click here for important safety tips

Canning is great for long-term storage without freezing.

Apples (Apple Sauce or Apple Butter):

  • Cook peeled and sliced apples with a little water until soft.
  • Mash or blend, then add cinnamon or sugar if desired.
  • Pour into sterilized jars and process in a hot water bath for 10 minutes.
  • Use for: Spreading on toast, baking, or eating as-is.

Zucchini (Pickles or Relish):

  • Slice zucchini into rounds or sticks/spears.
  • Pack into sterilized jars with vinegar, garlic, dill, and salt.
  • Process in a hot water bath for 10–15 minutes.
  • Use for: Sandwiches, salads, or snacking.

Beets (Pickled Beets):

  • Boil or roast whole beets until soft, then peel and slice.
  • Pack into sterilized jars with a hot brine (vinegar, sugar, salt, and spices).
  • Process in a hot water bath for 30 minutes.
  • Use for: Salads, side dishes, or sandwiches.

Onions (Pickled Onions):

  • Slice onions thinly and pack into sterilized jars.
  • Pour hot vinegar brine (vinegar, sugar, salt) over them.
  • Store in the fridge for up to 1 month or process in a hot water bath for 10 minutes for longer storage.
  • Use for: Burgers, tacos, sandwiches.

Bell Peppers (Roasted and Preserved in Oil/Vinegar):

  • Roast peppers, peel the skin, and slice.
  • Pack into jars with vinegar or oil and a little salt.
  • Store in the fridge or process in a hot water bath for 15 minutes.
  • Use for: Sandwiches, pasta, or antipasto platters.

Be sure to follow Health Canada’s guidelines on canning any fruits and vegetables.  


3. Dehydrating

Dehydrating removes moisture for long-term storage. You can use a dehydrator or an oven at 135–150°F (57–65°C) with the door slightly open.

Apples (Apple Chips):

  • Slice apples thinly and dip in lemon water to prevent browning.
  • Arrange on dehydrator trays or a baking sheet.
  • Dehydrate at 135°F (57°C) for 6–8 hours until crisp.
  • Use for: Snacking, granola, or baking.

Zucchini (Zucchini Chips or Powder):

  • Slice into thin rounds or shred for powder.
  • Dehydrate at 125°F (52°C) for 6–12 hours.
  • Blend dried zucchini into powder for soups or sauces.
  • Use for: Snacks, soups, or pasta sauce thickener.

Beets (Beet Chips or Powder):

  • Slice thinly and arrange on trays.
  • Dehydrate at 135°F (57°C) for 6–10 hours.
  • Blend dried beets into a powder for smoothies.
  • Use for: Snacking or adding color to food.

Onions (Dried or Powdered):

  • Slice onions into thin rings.
  • Dehydrate at 125°F (52°C) for 6–10 hours until brittle.
  • Blend into onion powder if desired.
  • Use for: Cooking, soups, seasonings.

Bell Peppers (Dried Strips or Powder):

  • Cut into strips or dice.
  • Dehydrate at 125°F (52°C) for 8–12 hours.
  • Blend dried peppers into a powder for seasoning.
  • Use for: Soups, casseroles, or spice blends.

Lime (Dried Slices or Powder):

  • Slice thinly and remove seeds.
  • Dehydrate at 125°F (52°C) for 6–8 hours.
  • Use whole dried slices for tea or grind into lime powder.
  • Use for: Drinks, marinades, seasoning.
After any dehydration process, remove the dehydrated pieces to place in a glass jar. Any pieces that feel like they are still not fully dry, put them back into the dehydrator until dried.  
 

Follow this link to learn more about the dehydrating process.


Dehydrating Foods: A Simple, Low-Cost Way to Preserve and Save

Dehydrating food is a simple, low-cost method to preserve fruits and vegetables, and it can save you money in the long run. By drying foods at home, you can stock up on healthy ingredients when they are in season or when they are available at a lower price in stores. Whether you’re purchasing items from the grocery store or receiving extra produce from the Cambridge Food Bank Community Pantry or purchasing Mobile Food Market baskets, dehydration is a practical and efficient way to make the most out of what you have and avoid waste.

Easy Foods to Dehydrate

Here are some simple foods that dehydrate well, and many of them can be used in everyday meals or enjoyed as tasty snacks:

  • Carrots: Great for soups, stews, or other meals. Dehydrated carrots are perfect for rehydrating when you need them in cooking, and they retain most of their nutrients.
  • Celery: A handy addition to soups, stews, and salads, dehydrated celery can also be rehydrated and used in place of fresh celery when needed.
  • Onions: Dehydrated onions are a fantastic addition to almost any dish and save you from having to chop fresh onions every time you cook.
  • Apples: Dehydrated apples make a delicious and healthy snack. They can also be used in baking or mixed into oatmeal, granola, or smoothies. Dehydrated apples are higher in sugar so be sure to eat them in moderation.
  • Tomatoes: A great addition to soups, sauces, and stews. Dehydrated tomatoes can be ground into powder and used as tomato paste or in seasoning mixes.

How to Dehydrate Foods

*Dehydrating food doesn’t require expensive equipment. You can use a simple food dehydrator, which is a relatively low-cost investment, or you can use your oven if the temperature is low enough (usually around 135°F or 57°C).  Be sure to consider the amount of energy an oven might use overtime vs the cost of a dehydrator.  Here’s a basic method for dehydrating foods:

  1. Prepare the food: Wash, peel, and chop your fruits or vegetables into uniform pieces to ensure even drying.
  2. Blanch vegetables (if necessary): Some vegetables, like carrots or celery, should be blanched before dehydrating to preserve color and nutrients. Simply dip them in boiling water for 1-2 minutes, then cool in ice water.
  3. Dehydrate: Arrange the food on the trays of your dehydrator, ensuring that the pieces don’t overlap. If using an oven, place the food on a baking sheet and leave the door slightly ajar for airflow.
  4. Store: Once dehydrated, store your food in airtight containers, such as glass jars or vacuum-sealed bags. Make sure the food is completely dry before sealing to avoid spoilage.

Stay Tuned for More Tips!

Dehydrating foods is just the beginning of your food preservation journey. Be sure to follow our posts for more tips and tricks on how to make the most of your food storage options. We’ll cover:

  • How to make room in the freezer for other essentials.
  • When is the best time to dehydrate different foods.
  • How to store your dehydrated foods with low-cost or no-cost solutions.
  • Simple recipes you can create using dehydrated foods.
  • And much more!

Dehydration is a great way to ensure that your food lasts longer, saves you money, and reduces waste. By learning and experimenting with dehydrating at home, you can enjoy your favourite foods year-round without the need for expensive trips to the grocery store. Stay tuned, and we’ll guide you every step of the way to make your food storage both simple and affordable.

A special thank you to one of our food bank participants for sharing her journey of dehydrating food with us. She will continue to be a part of our dehydrating sharing experience, offering her insights, lessons learned, and support to all of you.  Here are some pictures of her experiences.

Dehydrated Onions
Dehydrated Celery
Dehydrated Frozen Vegetables
Dehydrated Apples

*You should always consult your dehydrator’s manufacturer’s manual for recommended procedures and drying temperatures and times.

Fight Climate Change: Five Ways You Can Reduce Greenhouse Gases and Waste at Home

As the effects of climate change become more pronounced, the challenges we face in ensuring food security are also growing. Food insecurity and climate change are interlinked in several ways. Extreme weather events, unpredictable growing seasons, and rising temperatures are all making it harder to produce food consistently and sustainably.  Natural Resources Canada warns: “An increase in climate variability and the frequency of extreme events would adversely affect the agricultural industry.”   Supply then becomes less reliable and prices increase. This makes it harder for vulnerable populations to access the nutritious food they need. Additionally, food that goes unsold or unused often ends up in landfills, where it decomposes and releases methane—a greenhouse gas significantly more potent than carbon dioxide. 

But the impact of climate change on food doesn’t stop at the farm. The entire food system—from production to distribution—feels the effects, leading to increased demand on food banks and community services. At the Cambridge Food Bank, we’re acutely aware of these challenges and are working to address them in ways that benefit both our community and our planet.

Food diversion a key part of our strategy. Through partnerships with local grocers, farmers, restaurants, and food manufacturers etc., last year we rescued over 140,000 lbs of food that would otherwise go to waste and redirected it to those in need. This not only helps feed our community but also prevents the environmental damage that comes from food waste. 

Through wellness programs, we’re also tackling the issue of food waste.  Recently  50 % of the participants in our adults and seniors’ wellness programs said they are now decreasing food waste by using all parts of the food whenever possible.  

When we measured the impact of rescuing and processing 1,200 lbs of food through our food recovery system, the results were astounding. We saved $2,454 worth of consumable food and 217,385 calories—enough to sustain a 19-30-year-old male with adequate daily intake for 104 days or feed a family of four for 7.8 weeks. Environmentally, this is equivalent to preventing the emissions from driving a gas-powered vehicle 4,209 km from Cambridge, ON to Victoria, BC, and keeping 858,819 grams of greenhouse gases out of the atmosphere.

The fight against climate change is a complex and urgent one, and food banks have a unique role to play. At the Cambridge Food Bank, we’re proud to be part of the solution by connecting food insecurity and climate action in meaningful ways. By rescuing food, reducing waste, and supporting our community, we’re working towards a healthier planet and a more secure future for everyone.

Five Ways You Can Reduce Greenhouse Gases and Waste at Home

  1. Plan Your Meals and Shop Wisely:
    • By planning your meals for the week and making a shopping list, you can buy only what you need and avoid over-purchasing. This reduces the chances of food spoiling before you can use it, thereby cutting down on waste.
  2. Compost Your Food Scraps:
    • Instead of throwing food scraps into the trash where they contribute to landfill waste and methane emissions, start a compost bin. Composting turns organic waste into valuable soil that can enrich your garden or local green spaces.
  3. Eat More Plant-Based Meals:
    • Animal agriculture is a significant contributor to greenhouse gas emissions. By incorporating more plant-based meals into your diet, you can reduce your carbon footprint. Even committing to one meatless day a week can have a positive impact.
  4. Properly Store Your Food:
    • Learning how to store fruits, vegetables, and other perishables correctly can extend their shelf life and prevent them from going bad. For example, keeping your refrigerator at the right temperature and using airtight containers can help keep food fresh longer.
  5. Support Local and Sustainable Brands:
    • Whenever possible, choose to buy from local farmers and brands that prioritize sustainable practices. Local food requires less transportation, which means fewer emissions. Plus, sustainable brands often use eco-friendly packaging and production methods.

We invite you to join us in this mission. Whether by supporting our programs or simply making mindful choices in your own life, you can help make a difference.

Reducing Packaging Waste

Welcome back to our series on environmental sustainability! Today, we’re talking about the importance of reducing packaging waste in our everyday lives. From grocery shopping to meal prep, there are plenty of ways to minimize the amount of plastic and packaging that ends up in landfills.

Bring Your Own Bags

One of the easiest ways to reduce packaging waste is by bringing your own reusable bags when you go shopping. Whether you’re picking up groceries or browsing the farmers market, a sturdy reusable bag can help minimize the need for additional bags.

Reuse Your Bags

Instead of tossing out your bags after each use, consider reusing them. Use them for future shopping trips or repurpose them for other household needs. Here are some ideas:

  • Save milk bags to see if there are local organizations accepting them for repurposing.
  • Wash and dry milk sleeve bags to use as small freezer bags.
  • Clean and dry Ziploc bags for reuse instead of acquiring new ones.
  • Keep bread bags for use as liners in thin bathroom garbage cans.

Whenever a plastic bag comes into your possession, ask yourself where else you could reuse it in your home.

Reuse Your Containers

Another effective way to reduce packaging waste is by repurposing containers. Whether it’s glass jars, plastic tubs, yogurt containers, or clamshells, there are countless possibilities for giving these items a second life.

Glass Jars: don’t throw away those empty glass jars—turn them into storage containers instead! Clean them out thoroughly and use them to store dried goods like beans, rice, pasta, or some baking ingredients. Glass jars are perfect for keeping pantry staples fresh and organized.

Plastic Containers: Clear plastic containers can be incredibly versatile when it comes to storage. Use them to organize small items like nails, screws, buttons, or craft supplies in your workshop or garage. By repurposing these containers, you not only reduce waste but also keep your space neat and tidy.

Yogurt Containers: Instead of tossing empty yogurt containers into the recycling bin, give them a new purpose in your home or garden. Yogurt containers make excellent plant pots for starting seedlings or propagating cuttings. Simply poke some holes in the bottom for drainage and fill them with soil. They’re a budget-friendly alternative to store-bought plant pots.

Strawberry Clamshell Containers: Reusing strawberry clamshell containers is another clever way to reduce waste. These containers already have holes in the bottom, making them perfect for planting seeds or seedlings. Simply fill them with soil, plant your seeds, and place them in a sunny spot. Remember to place a recycled tray underneath to catch any excess water, ensuring your plants stay healthy and your floors stay dry.

Plastic Trays: Those plastic trays that come with packaged foods can serve as useful bases for potted plants. Place them under plant pots to catch excess water and prevent spills, protecting your floors and surfaces. Plus, they’re easy to clean and reuse again and again.

By thinking creatively and finding new uses for containers, you can extend their lifespan and minimize waste in your home. So, before you toss anything into the recycling bin, ask yourself if it could serve another purpose first!

Choose Loose Produce

When shopping for fruits and vegetables, opt for loose items instead of pre-packaged ones. Not only does this reduce plastic waste, but it also allows you to select only the amount you need, reducing the likelihood of food waste.

Make Your Own

Instead of buying pre-packaged foods like cookies or granola bars, consider making your own at home. Not only is it more cost-effective, but it also allows you to control the ingredients and packaging.

Pack Your Own Lunch

Eating out can be convenient, but it often results in unnecessary packaging waste. Instead, pack your own lunch using reusable containers and cutlery. Not only is it better for the environment, but it’s also healthier and more budget-friendly.

Buy Second-Hand Items

In our journey towards reducing packaging waste and fostering environmental sustainability, another impactful step we can take is to buy second-hand items. Not only is this practice more affordable, but it also offers a host of other benefits that contribute to a greener planet.

Affordability and Convenience: Buying second-hand allows you to acquire items at a fraction of the cost of buying new. Whether you’re in need of furniture, clothing, electronics, or household goods, shopping second-hand can save you a significant amount of money. Additionally, many second-hand items come fully assembled, saving you the time and hassle of putting them together yourself.

Unique Options: One of the joys of shopping second-hand is the opportunity to discover unique and one-of-a-kind items. From vintage clothing to antique furniture, second-hand stores offer a treasure trove of unique finds that you won’t find in mainstream retail stores. Embrace your individuality and add a touch of character to your home or wardrobe with second-hand gems.

Reduced Packaging and Carbon Footprint: By opting for second-hand items, you’re not only saving money but also reducing the demand for new products. This means fewer resources are consumed in the manufacturing and packaging process, leading to a reduction in carbon emissions and environmental impact. Additionally, by giving pre-loved items a new lease on life, we prevent them from ending up in landfills where they could take centuries to decompose.

Community Impact: Shopping second-hand also supports local businesses and charities, as many second-hand stores are run by non-profit organizations or small businesses. Your purchases contribute to the sustainability of these establishments and help them continue their valuable work in the community.

When choosing to buy second-hand, we can make a positive impact on the environment while also enjoying the benefits of affordability, uniqueness, and convenience. So next time you’re in need of something, consider checking out your local thrift store or online marketplace for second-hand treasures!

By making small changes to our shopping, home, and eating habits, we can all do our part to reduce packaging waste and create a more sustainable future. Remember, every little bit counts!

Growing Your Own Food

In our quest for environmental sustainability, one of the most impactful actions we can take is growing our own food. Whether you have acres of land or just a small balcony, there are plenty of ways to cultivate fresh produce right at home.

Container Gardening

You don’t need a sprawling garden to grow your own food. Many fruits, vegetables, and herbs can thrive in containers such as buckets, planters, or even water. Here are some easy-to-grow items for container gardening:

  • Tomatoes
  • Herbs (basil, parsley, mint)
  • Lettuce
  • Peppers
  • Strawberries
  • Kratky Method

Looking for a low-maintenance way to grow fresh produce? Consider the Kratky method which is growing plants without soil. Instead, plants are grown in a nutrient-rich water solution, making it ideal for small spaces and indoor gardening.

Did you know that the Cambridge Food Bank gives mostly fresh foods in our emergency food hampers? Consider growing extra fruits and vegetables this season and we’d be happy to accept your donations.  Sign up here if you’d like to show your interest in doing so.

Supporting Local Farmers Markets

Another great way to reduce the environmental impact of buying groceries is by supporting local farmers markets. Not only are you getting fresh, locally grown produce, but you’re also reducing the carbon footprint associated with transportation and packaging.  Consider visiting the farmer’s markets in Cambridge this season.

By growing your own food and supporting local farmers, you can take a big step towards a more sustainable future.